

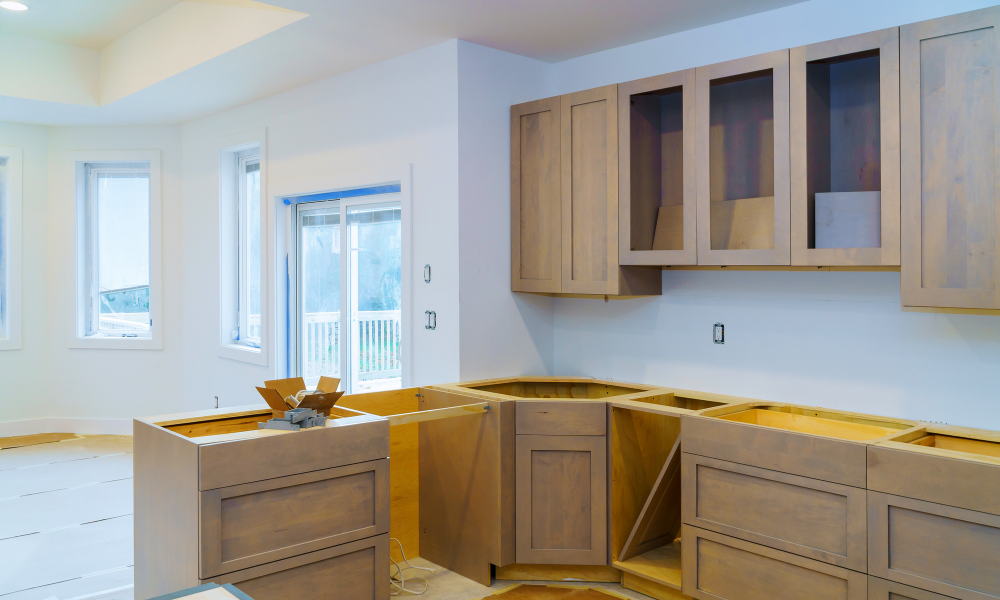
If there are old laminate cabinets in your kitchen, what will you do? Isn’t it displeasing enough to ruin your mood in the kitchen? But don’t get frustrated. We are happy to say that you can definitely trust us and paint your cabinets easily. Here we have done all the possible attempts to meet you with your desired kitchen cabinet renovation.
Keep reading to find all the information you need to know about laminate painting and the core solution of how to paint laminate kitchen cabinets. It isn’t much difficult to paint laminate cabinets as it seems. Achieve flawless finishing with our helpful step-by-step guide. Applying these safe, easy, and affordable steps you can make your kitchen cabinets looking so sophisticated, and elegant which will also add value to your property.
So, what are you waiting for? Transform your kitchen cabinets today using the right method. With easy modifications and a minimal financial investment, your cabinets will get an up-to-date makeover.
How can you know if your cabinets are made up of laminate or veneer?

Frankly speaking, Laminate, also known as Melamine or Thermofoil, is actually a man-made or artificial sheet, a thin layer of plastic, paper, or foil, that has been printed with a wood grain pattern to imitate the actual wood surface. It can be attached to any type of furniture, cabinets, wood-like products, and flooring. Moreover, it allows the manufacturer to create cabinets, furniture, and floors for less money. It is just like the illustration of real wood linked to less expensive wood composites like plywood or particleboard. With proper preparation, you can paint the laminate yet it can not be stained.
In contrast, a veneer is slightly the same concept as the Laminate but in place of a plastic layer on the top of the plywood or particleboard, it has a sheet or thin layer of natural wood. This veneer is basically cohered to the low-grade wood surface giving a natural and premium look. Being not so costly, it fulfills the desire for quality wood with its rich and unique appearance. Additionally, it allows to creation of designs, and wood grain patterns on the surface. One fine thing about veneers is you can paint and stain with proper preparation.
See More: How to Decorate a Slanted Wall Bedroom
One easy formula we can share with you to know if your cabinets or veneers are to send them off. In the case of Laminate, you will see the wood composite underneath the sanded-off while the layer of veneer may be lifted with larger pieces from the desk.
What are the basic differences between Laminate and Veneer cabinets?
Let’s see a quick difference between Laminate and Veneer:
| Variable | Laminate | Veneer |
| Construction | Man-made | Real |
| Maintenance and Cleaning | Easy | Requires Effort |
| Appearance | Artificial | Natural |
| Durability | Comparatively High | Comparatively Low |
| Replacement | Easy | Tough |
| Resistance to Stain, Scratch, Water, Heat, and Moisture | High | Low |
| Cost | Budget-friendly | Higher Price |
Can you paint over laminate kitchen cabinets?
Oh Sure, You can calmly paint your laminate kitchen cabinets. You can draw any pattern or simply put solid color on them for a dramatic look. Though it is not an ideal surface to paint though it can be done by maintaining an accurate formula. And the brand new looks last for a longer period after painting.
Do you have to sand cabinets before painting?
What happens if you don’t sand before painting? Sanding is definitely a messy and time-consuming process but you cannot neglect this pre-step of painting. Mainly, when you are going to paint your laminate cabinet you cannot skip sanding them first. It is as thin as paper and so smooth, non-porous material, that’s why sanding is a crucial part of painting laminates.
The secret of good painting is to sand the laminate so that the paint can superbly grasp the paint. We always suggest using the 120 or 180-grit sandpaper to take the gloss off the finely. You just need to roughen the surface to stick the paint. Be careful not to add lots of pressure and sand the laminate.
How to Keep Your Room Clean and Organized
Can you paint straight over the laminate?
Certainly not, after sanding the surface, primer is so important. The trick is, the primer will smoothen the process to grab the paint onto the laminate. Here we can suggest that the primer needs at least seven days to dry completely. When the surface is ready, choose the best primer compatible with your paint. Check the label of the primer whether it is acrylic-based or oil-based and go for it accordingly. A good quality primer will ensure that the plasticized and very slick It will bond with the paint durably. Using a suitable primer will make the painting process effortless.
What kind of paints do you use in laminate cabinets?
Any high-quality paint that is suitable for the cabinets is fine. When you have completely finished the sanding and priming process, you can choose any high-quality paint. In the market, you will get “Tile and Laminate Paint” designed for the kitchen cabinet. For smooth and perfect finishing, we can propose using water-based Latex paint, which is highly recommended by the experts also.
Does the laminate painting look good?
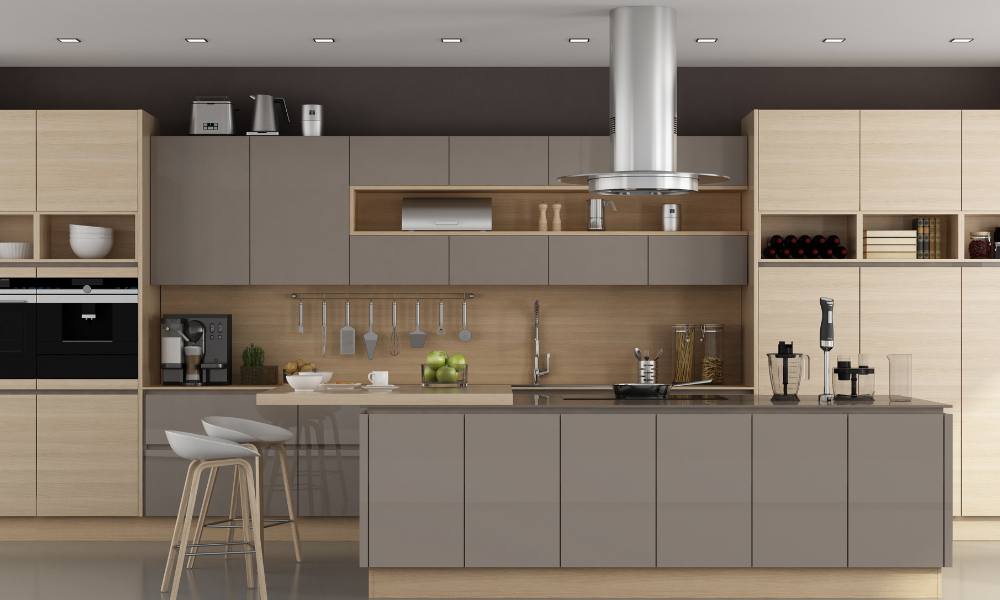
Painting laminate painting is worth it. Offering an inexpensive way, it adds a stunning look to the kitchen. For a unique and trendy look, you must go for painting kitchen cabinets. Don’t worry, you will love the painted laminate once you finish your journey. Applying our step-by-step process you can easily renovate the kitchen cabinets in a short amount of time. Besides, painted cabinets last more than 8-15 years. Painting old piece of laminate furniture will surely increase the beauty of your kitchen.
How much paint you will need to paint the laminate?
Before buying the paint, you must go for the estimated amount of paint as nobody wants to waste money. If you are not painting your entire kitchen, just the cabinets then you’ll not need much paint. Luckily, there is a general rule of thumb that for every 350 square feet, 1 gallon of paint is enough. So, decide according to the space of the cabinet and the results in your hand.
What are the tools and materials you need to paint laminate kitchen cabinets?
With proper preparation, your laminate cabinet painting will be fun. Let’s see the tools and materials you will need while painting cabinets.
See More: Best Pendant Lights For Kitchen Island
- Screwdriver or drill firstly
- 120/180-grit and 240-grit sandpaper secondly
- Tack cloth thirdly
- Laminate Primer
- Laminate Paint
- Paintbrush
- Microfibre roller
- Tray
- Bucket
- Gloves
- Dust mask
- Eye protection
How to paint laminate cabinets?
It’s time to take a comprehensive look at how to paint laminate kitchen cabinets. However, Painting the laminates will give you a fresh new kitchen. Well, the good part of this subject is you can paint laminate kitchen cabinets pretty easily. Painting laminate cabinets is a multi-step project. If you do it correctly, it will come up with great results. Avoiding further ado, here we’ll share the 8 steps to paint laminate cabinets effectively.
Step 1:
Once you have gathered all the tools and materials that are necessary for painting cabinets, the key step in starting the job is to remove cabinet doors and drawers from the frame. Also, remove the hardware including hinges, handles using the screwdriver and drill. So, It’s risky to work with the attached doors, drawers, and other hardware.
Step 2:
Check the cabinets as nobody wants to paint on any damaged or cracked laminate. If everything is OK, then comes the hygienic step. Here you will also need gloves, eye protection, and a dust mask to protect yourself from any kind of misery. Therefore, Give everything a clean-up with a packet of sugar soap as they are superbly efficient to remove dirt and grease.
Step 3:
To ensure long-lasting painting results, you must sand the cabinets first. As laminates are so glossy and inhospitable for painting. Sanding with 120-grit or 180-grit sandpaper will help the to make strong bondage with the paint. Don’t put much pressure, just nicely sand and it’s ready for priming. Clean the area once again using a tack cloth.
Step 4:
When you are sure the cabinet is dirt and dust-free, you can start priming. Applying a premium-quality primer is important for perfect painting. Principally, the primer depends on the material of your cabinets. You can use an Adhesion Promoting Primer for your kitchen cabinet. For fine strokes, use a high-quality paintbrush or microfiber ruler if you prefer. Don’t get so stressed if there is any visible brush mark, they can be removed later. We recommend 2 coats of primer to get perfect finishing. But the second coat is not mandatory. Start priming from the edges and then the other parts come accordingly. Leave the primer to dry thoroughly.
Step 5:
Before moving on to the next step, once the primer is dried completely, give a light sanding on the whole primed area again. Yes, again! In this sanding, use 240-grit sandpaper and lightly sand it to remove any imperfections or air bubbles. This will create lots of tiny grooves so that the next paint coat can smoothly stick to it.
Step 6:
Before start painting, make sure the surface is clean. Pick a high-quality paint specially designed for your laminate. Verify the new color of the paint if it matches the doors, and handles excellently. Then comes the first coat of paint at this stage. Let the first coat dry perfectly. Leave it for at least 4-6 hours. It’s best to give 8 hours to dry appropriately.
Step 7:
If you are not happy with the first coat then go for the second coat. But remember that you have to sand it lightly one more time with 240-grit sandpaper before putting the second coat. Every time you are going to give another coat repeat the paint, sand, and paint process. Hopefully, two or three coats are sufficient to make you happy. If you are not happy with the coverage, then repeat the coating, sanding, and coating until they are perfect.
Step 8:
Believe me, you are almost done. After finishing the painting, leave it to dry properly. All that is left is to reattach the doors, drawers, and other hardware correctly. You can also spray paint on the doors before placing them in their location. And You have finished the painting of your kitchen cabinet.
Here are some Do and don’t tip for painting laminate kitchen to get effective results:
| Do Tips | Don’t Tip |
| Do remove the cabinet door and hardware Do sand the laminate cabinet Do use primer before painting Do test your paint Do 2 or 3 coats of paint for perfection | Don’t over-sand the laminate strongly Don’t paint over damaged laminate Don’t leave the dirt and grit Don’t use old primer or paint Don’t leave brush stroke behind |
Conclusion:
With the proper preparation and some hard work, you can transform your old cabinets into fresh and trendy ones. Don’t want to do it yourself? Take painting project as a DIY Home project and you will love the experience for sure. But if you are worried about proper finishing then you may go for professionals or experts. So, Get an updated look by spending a little money. We heartily wish you to have a well-painted laminate kitchen cabinet. ENJOY LAMINATE PAINTING!