

Mastering the art of how to draw a chair combines creativity and technique, offering both beginners and seasoned artists a rewarding challenge. Drawing a chair requires understanding its structure, proportions, and unique details. From sketching the framework to adding textures like wood, metal, or fabric, each step enhances the depth and realism of your work. Whether you’re creating a simple wooden chair or an ornate design, precision and perspective play vital roles. With the right tools, such as quality pencils and textured paper, and a focus on observing details, anyone can bring a chair to life on paper. This manual offers a step-by-step approach to help you expectantly illustrate a chair with professional finesse and artistic aptitude.
Understanding Chair Anatomy

To draw a chair accurately, one must first understand its anatomy. Chairs come in various styles, from classic wooden designs to sleek modern forms made of metal or plastic. Despite their differences, most chairs share common components: the frame, seat, backrest, and legs. Observing these elements closely will help you break the structure down into manageable parts.
Focus on the intersections where these parts meet. Notice how the backrest often curves slightly for ergonomic comfort or how the legs may taper toward the bottom for aesthetic appeal. By dissecting a chair into these elements, you can simplify the drawing process and build a solid foundation for your artwork.
Gathering Your Materials

Before diving into your sketch, gather the right materials to ensure a smooth process. While many think any pencil and paper will suffice, having the proper tools can elevate the quality of your drawing. Invest in good-quality sketching pencils, an eraser, and a ruler. A blending stump or tortillon can also be handy for shading and creating smooth transitions.
Having a clear workspace is equally important. Choose a well-lit area where you can comfortably observe your reference clean an office chair or image. If you’re working from a photograph, select one that showcases the chair from an angle that interests you the most.
Essential Tools For Drawing A Chair
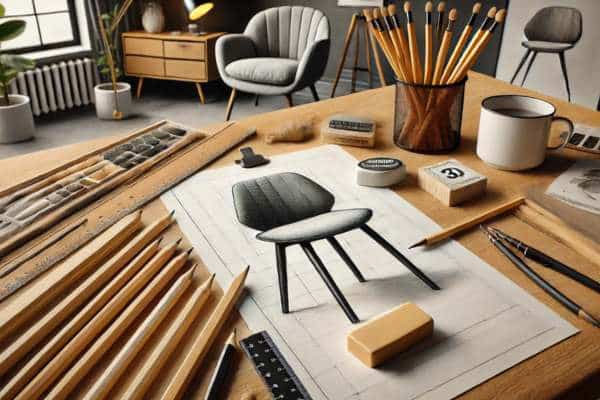
Your toolkit should include a variety of pencils ranging from soft (B) to hard (H). Soft pencils are best for shading and including depth, while hard pencils help create easy strains for the chair’s structure. Additionally, a mechanical pencil may be beneficial for exceptional details.
Beyond pencils, consider having:
- Erasable Colored Pencils: To outline preliminary sketches.
- Fine-Tip Markers: To add definition to the final piece.
- Graphite Powder: For large areas of shading. These tools not only make the drawing process easier but also allow for greater precision and detail.
Choosing The Right Paper For Sketching
The choice of paper can significantly influence the outcome of your drawing. Opt for paper with a medium to heavy weight to withstand erasing and layering. Textured paper, such as cold-pressed or vellum, adds a tactile quality to your sketches and can complement shading techniques.
Smooth paper is better suited for detailed work, especially if you intend to focus on intricate textures like upholstery patterns or wood grain. Experiment with different paper types to discover what best suits your style.
Starting With The Chair Frame Drawing Simple Lines
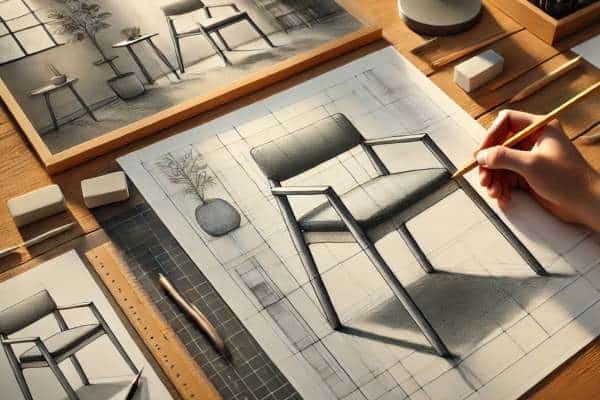
Begin by lightly sketching the chair’s frame. Use simple geometric shapes such as rectangles, circles, and lines to outline its basic structure. For example, the seat can be represented as a rectangle, while the legs can be drawn as straight lines extending downward.
Avoid pressing too hard on the paper during this stage, as these initial lines are your guide and will likely be erased or refined later. Focus on proportion—ensuring the seat, backrest, and legs are in harmony.
The Best Pencils For Detailed Chair Drawings
Not all pencils are created equal when it comes to detailed drawings. For intricate designs, consider using:
- HB Pencil: For light sketching and initial outlines.
- 2B or 4B Pencil: For adding shadows and depth.
- 6H Pencil: For faint, crisp lines that won’t smudge.
Experiment with layering tones using a combination of soft and hard pencils to achieve a realistic effect. Remember, the key to detail lies in patience and precision.
Adding Dimensions Sketching The Seat And Backrest
Once the frame is complete, begin adding dimensions to the seat and backrest. Chairs are three-dimensional objects, so it’s crucial to incorporate perspective. Use parallel lines to represent depth and foreshortening techniques for realism.
For the backrest, observe whether it is flat, curved, or padded. Each style requires different shading and linework to convey its unique characteristics. Layer your lines gradually to build a sense of volume.
Perfecting The Angles Understanding Chair Perspectives
Perspective is the cornerstone of a lifelike chair drawing. Chairs often involve angular shapes that can appear distorted if perspective is ignored. Use a vanishing point to guide the alignment of lines, ensuring that the seat, legs, and backrest converge naturally in space.
Practice one-point, two-point, and three-point perspectives to master how chairs appear from different viewpoints. This skill not only enhances realism but also adds a dynamic quality to your artwork.
Adding Legs Tips For Symmetry And Proportion
The legs are arguably the trickiest part of a chair to draw, as they must be symmetrical and proportionate to the rest of the structure. Start by drawing one leg, then replicate its position and angle for the others.
Use a ruler or compass for accuracy. If the chair has ornate or tapered legs, take your time to replicate their unique shapes. Remember to account for shadows beneath the legs to anchor the chair visually to the ground.
Draw Curved Lines For Elegant Chair Designs
Curved chairs, such as those with rounded armrests or arched backrests, require a delicate touch. Smooth, flowing lines can make or break the elegance of such designs. Practice drawing curves with consistent pressure to avoid jagged edges.
Consider using a French curve tool for precision. Focus on how curves connect seamlessly with the chair’s overall geometry, creating a harmonious appearance.
Adding Textures Representing Wood, Metal, Or Upholstery
Textures bring your chair to life. To depict wood, use fine, parallel lines to mimic grain patterns. For metal surfaces, emphasize sleekness and shine by blending graphite and adding highlights with an eraser.
Upholstered chairs demand a more nuanced approach. Capture the softness of fabric through gentle shading and cross-hatching. If the chair has intricate patterns, add these as the final touch to avoid smudging earlier work.
Frequently Asked Questions
– What Are the Basic Steps to Draw a Chair?
To draw a chair, start by sketching its basic framework using simple geometric shapes like rectangles and lines. Outline the seat, backrest, and legs lightly, ensuring they are proportionate. Gradually add depth and details by incorporating perspective and shading. Focus on defining textures and features, such as curved edges or patterns, to bring the chair to life.
– How Do You Sketch Chair Proportions Accurately?
Proportions are key to a realistic chair drawing. Begin by observing the height, width, and depth of the chair relative to its components. Use guidelines and a ruler to maintain symmetry. Visualize or lightly mark the vanishing points for perspective. Comparing the size of the seat, backrest, and legs to each other helps in achieving a balanced composition.
– What Tools Are Best for Drawing a Chair?
For precise sketches, use HB pencils for initial outlines and softer pencils (2B–4B) for shading. A ruler ensures clean, accurate lines, while a blending stump helps smooth transitions in shading. For detailed work, a fine-tip mechanical pencil is ideal. Use high-quality paper that supports layering and erasing without tearing.
– How Can You Add Realistic Details to a Chair Drawing?
Adding details involves careful observation. Represent wood grain with fine, parallel lines or mimic metal’s shine by blending shadows and highlights. For upholstery, use cross-hatching to suggest fabric texture. Adding shadows beneath and around the chair enhances realism and gives the object a grounded appearance.
Final Thoughts
Mastering how to draw a chair combines creativity with technique, transforming a simple concept into detailed art. Understanding chair anatomy, deciding on the proper gear, and practicing angle ensure precision and intensity to your sketches. By specializing in proportions, textures, and realistic details, you raise your drawing from basic to professional. Whether you’re an amateur exploring inventive abilities or a skilled artist refining techniques, chair drawing offers a worthwhile possibility to enhance creativity and accuracy. With practice and statement, your adventure in drawing chairs will result in fantastically crafted, sensible designs that showcase your unique creative imagination and prescientness.