
The Ninja Flip changed how I cook. It’s quick, neat, and makes food taste amazing. But like anything great, it needs care to stay that way. I learned this the messy way—grease, crumbs, and smells that wouldn’t go away. So I figured out how to clean Ninja Flip Air Fryer without stress. It’s easier than most people think.
In this guide, I’ll share simple steps that keep it fresh and working like new. Even those looking at the best air fryers under $50 will find these tips helpful. Let’s make cleaning feel less like a chore—and more like a win.
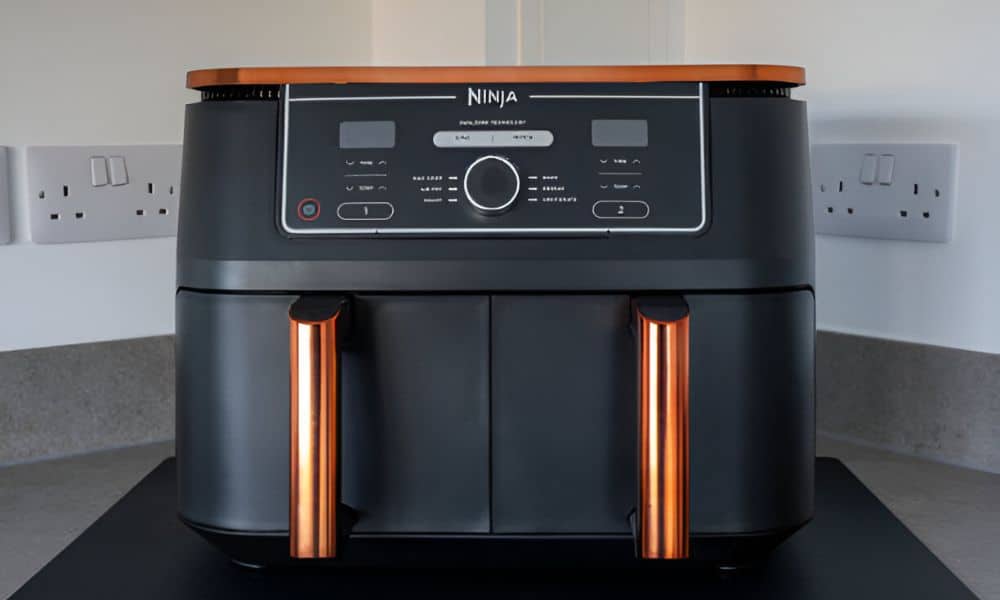
Meet the Ninja Flip Air Fryer
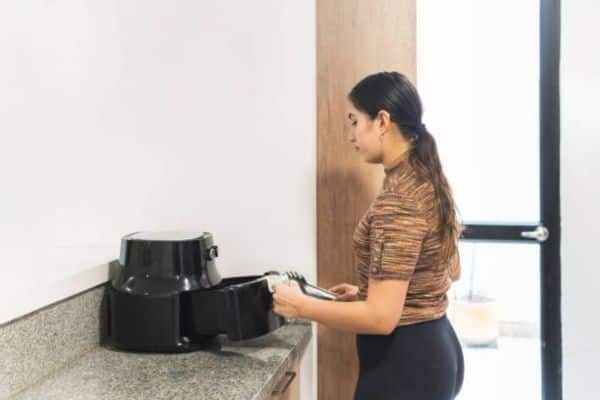
The Ninja Flip Air Fryer is more than just an appliance—it’s a space-saving game-changer. Unlike bulky countertop ovens, it stands up and flips away. That means more room for chopping, stirring, and coffee sipping.
It’s slim, but it works hard. Toast, roast, bake, and air fry—all in one. The control panel is easy to use. The cooking results? Crispy on the outside, juicy inside. Every time.
In our kitchen, it became the favorite fast. We use it more than the oven now. I love how it fits under the cabinets and doesn’t crowd the counter. Even guests ask what it is.
Before You Begin: What You’ll Need
Before you start, grab a few simple things. You don’t need fancy gear—just a few tools you likely already have.
Here’s what I use:
- A soft cloth or microfiber towel
- A sponge (non-scratch)
- Mild dish soap
- White vinegar
- Baking soda (for tough spots)
- An old toothbrush for corners
Always unplug the air fryer first. Let it cool all the way down. It makes cleaning safe and easier.
Step-by-Step: How To Clean Ninja Flip Air Fryer
Cleaning doesn’t need to be hard. I’ve broken it down into simple steps that take just a few minutes. This is exactly how to clean Ninja Flip Air Fryer and keep it working like new.
Cool and Unplug

Always unplug it first. Let it cool all the way down. This keeps you safe and protects the unit.
Flip It Up
Lift it into the upright “flip” position. It saves space and gives better access. Place a towel under it to catch crumbs.
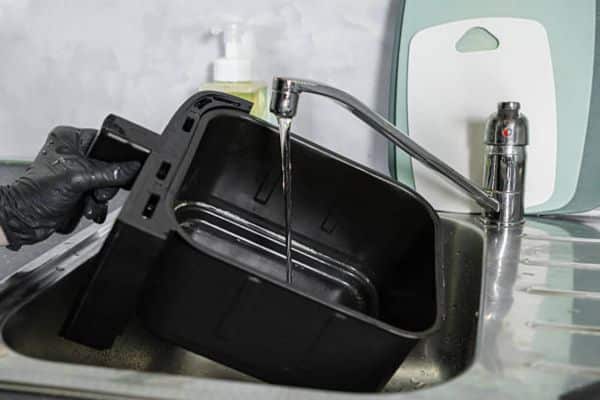
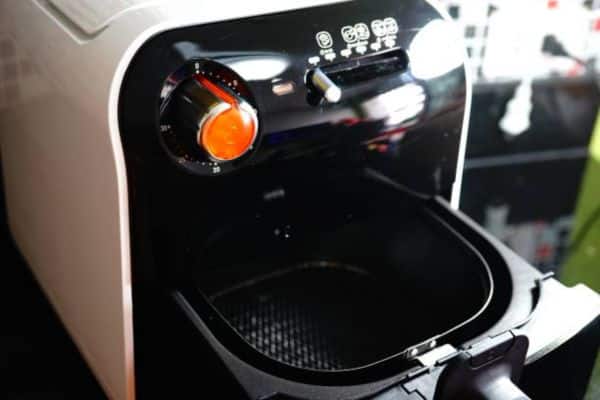
Remove Crumb Tray
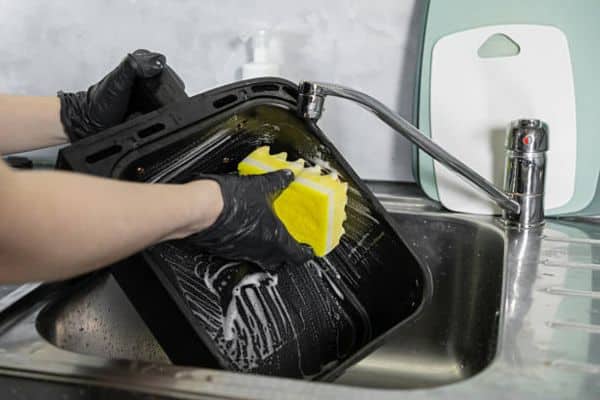
Slide out the tray from the bottom. Dump crumbs into the trash. Wash it with warm water and soap. Let it dry before putting it back.
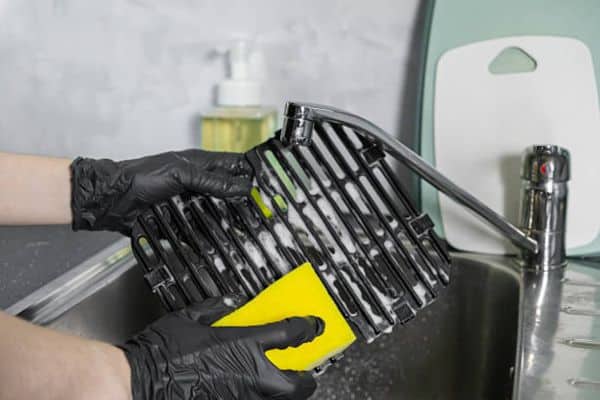
Wash Racks and Trays
Soak them in soapy water for ten minutes. Use a sponge to scrub away grease. Rinse and dry well. For stuck-on mess, try a baking soda paste.
Wipe Down Interior Walls
Use a damp cloth with mild soap. Gently wipe the sides, top, and bottom. Spray cleaner on the cloth—not inside the unit. Avoid dripping into corners.
Clean Door and Exterior
Wipe the door inside and out. A mix of vinegar and water works great on glass. Use a cloth to shine the outside and buttons. Skip paper towels—they leave lint.
Check Heating Element (Carefully!)
Look under the top. Use a dry brush to knock off crumbs. Never use water here. Be gentle. A soft touch keeps it working longer.
And that’s it. Fast, easy, and back to sparkling.
Quick Cleaning vs. Deep Cleaning
Not every clean needs to be deep. Some days, a quick wipe is all it takes. Other times, a deeper scrub makes a big difference. Here’s how I break it down.
Quick Cleaning (Daily or After Each Use)
- Let it cool and unplug.
- Wipe the inside with a damp cloth.
- Rinse the crumb tray and let it dry.
- Clean spills or grease right away before they stick.
This takes less than five minutes but keeps things fresh.
Deep Cleaning (Weekly or Monthly)
- Wash all racks, trays, and crumb catcher.
- Wipe down interior walls, ceiling, and door.
- Clean the heating element with a dry brush.
- Shine the outside and polish the buttons.
A full clean helps your fryer last longer and cook better.
Pro Tip
I make it part of my Sunday reset. You can even set a reminder on your phone. That way, you never forget and your fryer stays in top shape.
My Best Tips from Cleaning Experience
Over time, I’ve picked up a few tricks that make cleaning easier—and even a little fun. These small things save time and keep the air fryer looking brand new.
Lemon Steam Works Like Magic
Slice a lemon and drop it in a bowl of water. Place it inside the fryer and run it at 400°F for five minutes. Let it sit for ten. Open it up, and grease wipes off like butter on a hot pan. Plus, it smells amazing.
Toothbrush Trick for Tight Spots
Some crumbs hide in corners. I keep an old toothbrush just for this. It reaches behind racks and in tiny edges without scratching the surface.
Skip the Scrub, Save the Surface
Don’t press too hard. The non-stick coating needs a gentle touch. Use a sponge, not a scrub pad. That way, your fryer lasts longer.
Microfiber = Streak-Free Shine
I’ve tried lots of cloths. Microfiber is the winner. It dries fast, leaves no lint, and keeps the glass and buttons looking sharp.
These tips may be simple, but they make all the difference.
Common Mistakes to Avoid
Even the best air fryer owners slip up. I’ve made a few of these myself. Here’s what to avoid so your Ninja Flip stays safe and strong.
Skip the Harsh Chemicals
Strong cleaners may seem like a quick fix, but they can damage the inside. Stick to mild soap, vinegar, and water. They work just as well—and won’t leave behind toxic fumes.
Always Dry Before Reassembling
Moisture gets trapped fast. It leads to rust, bad smells, and slow performance. After washing, dry every piece fully before putting it back.
Keep the Heating Coil Dry
This part is sensitive. Never wipe it with a wet cloth. Use a soft, dry brush to dust it gently. Wetting it can cause damage or even a short.
Don’t Ignore Smells or Smoke
A weird smell or a little smoke means something’s stuck. Stop, unplug, and clean it. It’s often just crumbs or grease—but left alone, it can become a fire risk.
Avoid these mistakes, and your fryer will treat you right.
Don’t Have One Yet? Here’s What to Know About Budget Options
Still thinking about getting an air fryer? You’re not alone. More home cooks are switching every day—for good reason.
There are plenty of great choices out there, including some of the best air fryers under $50. These budget-friendly models are small, simple, and easy to use. Many come with just one basket, a timer dial, and basic settings. For light meals or tight spaces, they get the job done.
Here’s what I’d check before buying:
- Size – Will it fit your counter? Can it cook enough for your needs?
- Ease of cleaning – Are the parts removable and dishwasher safe?
- Safety – Cool-touch handles and auto-shutoff are must-haves.
Now, if you want a little more power and versatility, the Ninja Flip is worth the extra investment. It gives you more space, more functions, and a unique flip-up design that saves counter space. It’s my personal favorite—and the one I trust most in my kitchen.
Final Thoughts
A clean air fryer isn’t just nice to look at—it cooks better, lasts longer, and keeps your kitchen feeling fresh. The steps are simple. Wipe it often. Wash the trays. Give it a deeper clean now and then. Small habits go a long way.
It may seem like a chore at first, but once you get into the rhythm, it’s easy. It becomes part of your cooking flow—just like washing a favorite pan or sharpening a good knife.
Got your own tips or cleaning hacks? I’d love to hear them. We all learn best by sharing.
FAQs
How often should you clean a Ninja Flip Air Fryer?
Clean it lightly after every use. Wipe the inside and empty the crumb tray. For a full clean, wash the trays, racks, and inside walls. Once a week is ideal. For light use, once a month works too. Regular care keeps the fryer working well and lasting longer.
Are Ninja Flip Air Fryer parts dishwasher-safe?
Yes, most removable parts are safe for the dishwasher. The crumb tray and racks can go in without worry. Always check the manual to be sure. Some parts may need gentle hand washing to protect the coating.
How do you get rid of smells or stuck grease?
Use a simple lemon steam trick. Put sliced lemon in a bowl of water. Run the fryer at 400°F for five minutes, then let it sit. Grease softens, and the smell goes away fast.