
I smelled smoke before I saw it. My fries were cooking, but the air turned sharp. Not a warm kitchen smell—something burnt. I cleaned the basket, but the smell stayed. That’s when I found the hidden mess. Grease had baked onto the heating bar. Many users miss it, but it’s the key to clean, crisp food. Learning how to clean air fryer heating element Ninja models made all the difference. The smoke stopped. My meals tasted fresh again. In this guide, I’ll show you how to do it right—fast, safe, and easy. Your air fryer will thank you.
Understanding the Ninja Air Fryer
The Ninja air fryer cooks with hot air. A fan blows that air over the food. It makes meals crisp without using much oil. The process is fast, clean, and simple.
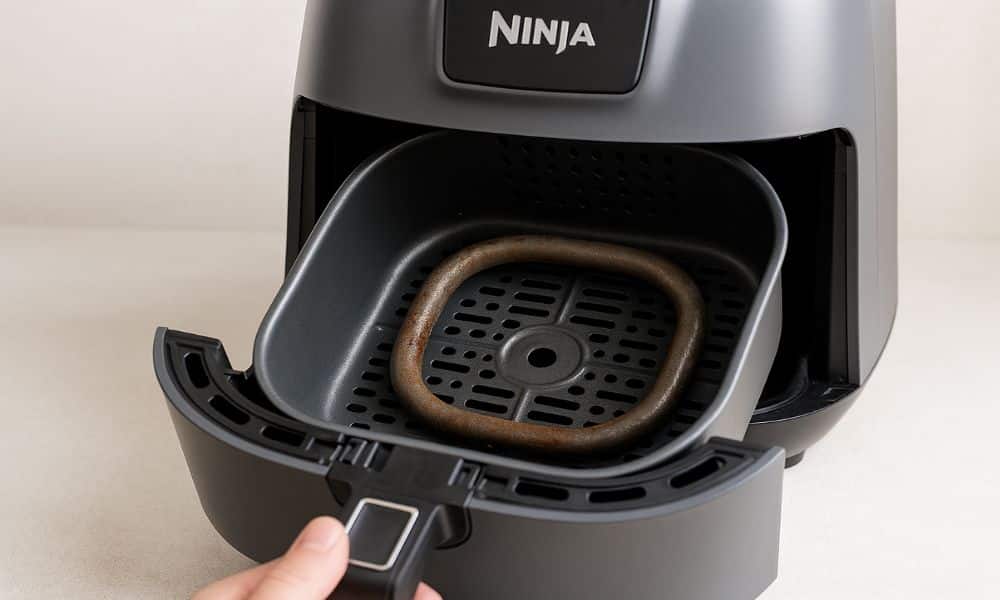
At the top of the unit, above the basket, there’s a coil. That’s the heating element. It gets very hot and stays that way through cooking. It’s the main part that cooks the food right.
Steam, oil, and crumbs rise while cooking. These float up and hit the coil. They stick, harden, and turn dark. After a while, that dirt starts to smoke.
Most people scrub the basket and stop there. They miss the real trouble. The mess that burns lives at the top.
Tools You’ll Need (Keep It Simple)
ou don’t need fancy gear to clean your air fryer. Most of the tools are already in your kitchen. A few soft items and a little care go a long way.
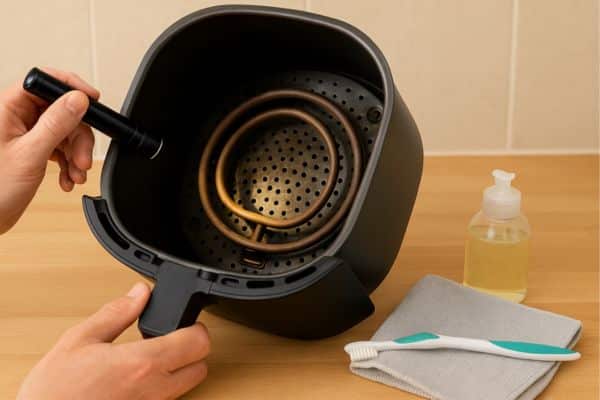
Start with a soft cloth. Microfiber works best. It grabs grease without scratching the surface.
Use mild dish soap. Pick one that cuts oil but stays gentle. A drop or two is enough.
Grab an old toothbrush. The soft bristles reach tight spots and lift crumbs with ease.
Keep a toothpick or wooden skewer nearby. These help clean behind the coil and in corners. Be gentle. A light touch is enough.
For sticky mess, mix baking soda with water. This forms a soft paste. It breaks down burned spots without harm. Use only if the coil needs extra help.
That’s all you need. No harsh sprays. No wires. Just simple tools that treat your fryer with care.
This setup works well for all models—even some of the best air fryers under $50.
Safety First: Cool and Unplug
Before cleaning, always unplug the air fryer. It may look off, but power can still flow. The heating coil stays hot long after cooking ends. Touching it too soon can burn your fingers.
Give it time to cool. I usually wait 30 minutes or more. Some days, I let it sit until the next morning. Cool metal is much safer to clean.
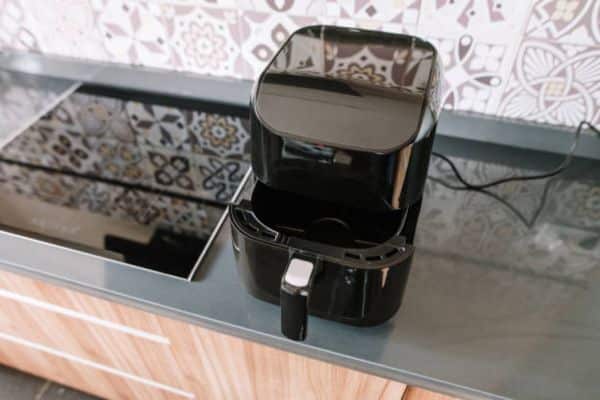
Once cool, tilt the air fryer to the side. Do it gently, just enough to see inside. Use a flashlight or phone light to spot the coil.
Now you’re ready to clean without risk. A cool, unplugged fryer is not just safe—it makes cleaning smoother too.
How to Clean Air Fryer Heating Element Ninja (Step-by-Step)
Cleaning the heating element sounds tricky, but it’s not. Follow these five simple steps, and you’ll get it done fast. No stress, no mess.
01. Tip & Light: How to See the Element
Turn the air fryer to the side. Use your hand to steady it. Shine a light into the top of the chamber. You’ll see a metal coil—that’s the heating element.
It often hides behind shadows. A flashlight or your phone makes it clear. Once you see it, you’re ready to start.
02. Dry Brush First: Removing Loose Crumbs
Grab a clean, dry toothbrush. Gently brush around the coil. Use soft strokes. Let the bristles lift loose bits and dust.
Don’t press too hard. You want to clean, not damage. Let crumbs fall naturally.
03. Damp Cloth Wipe: Lifting Grease Without Damage
Dip your cloth into warm soapy water. Wring it out well. It should be damp, not wet. Wipe the coil gently.
Use slow, careful motions. Don’t scrub. Let the warmth and soap do the work. Grease will loosen as you go.
04. Baking Soda Paste: For Stubborn Spots

Mix baking soda with a little water. It should look like paste, not soup. Dab a bit on sticky spots.
Wait five minutes. Then wipe again with your damp cloth. Most grime comes off without trouble.
05. Final Wipe: Let It Dry Completely
Use a clean, dry cloth for one last wipe. This removes moisture and soap. Leave the air fryer open for 30 minutes. Let the inside dry on its own.
Now the coil is clean and dry. You’re done—and your food will taste fresh again.
What Not To Do
Some tools can harm your air fryer. Others just make the job harder. A few simple mistakes can lead to damage. Here’s what to avoid.
Don’t use metal brushes.
They scratch the surface and can bend the coil. Even one hard scrape can reduce how well it heats. Always stick to soft bristles like an old toothbrush.
Avoid harsh chemicals.
Strong cleaners may leave behind fumes or stains. They can eat away at coatings inside the unit. Mild soap is all you need.
No soaking or spraying water inside.
The air fryer has wires and heat parts. Too much water can ruin them. Always use a damp cloth—never pour or spray.
The heating element is fragile.
It may look tough, but it’s not. Be gentle with each wipe. Treat it like you would a non-stick pan—soft hands, no pressure.
Pro Tips from Years of Use

Over time, small habits make a big difference. These tips have saved me from mess, smoke, and extra scrubbing. Try them out—they’re easy to follow and work well for all models.
Clean after every 5–7 uses.
The basket may need cleaning more often, but the coil can wait a few rounds. A weekly wipe keeps buildup away. It’s quick and saves time in the long run.
Never spray oil directly inside.
Oil mist clings to the heating element. It leaves a sticky layer that’s hard to clean. Always coat food before placing it in the basket.
Leave the lid open after use.
Once you’re done cooking, let it breathe. This lets steam escape and keeps the inside dry. Moisture invites grease to stick, so airing it out helps a lot.
How Often Should You Clean It?
The heating element doesn’t need daily care. But it should still be part of your routine. I clean mine once a week, or every five to seven uses. That keeps it fresh and ready.
Your cleaning schedule may vary. Light snacks cause less mess. Greasy foods like wings or bacon leave more behind.
Look for signs. A burnt smell means grime is heating up. Smoke from the back vent is a red flag. Uneven cooking or slow heat can also be clues.
Catch these early, and a simple wipe will fix it. Wait too long, and the mess takes over.
Final Thoughts
A clean heating element makes all the difference. Your food smells better. It cooks faster and tastes fresh. No more smoke, no more burnt spots.
Keeping it clean also protects your air fryer. It runs smoother and lasts longer. You save time, money, and effort in the long run.
This small habit brings big rewards. Just a few minutes each week can keep your fryer in top shape. Your meals will show the care.
Try it today. Shine that coil and see the change for yourself. Once you start, it becomes a simple part of your kitchen rhythm.
FAQs
Can I use vinegar to clean the heating element?
Yes, but use it with care. Mix equal parts vinegar and water. Dip a soft cloth in the mix, then wring it out well. Gently wipe the coil—no soaking or spraying. Always dry the area after.
What’s the best way to remove burnt food from the top?
Use a dry toothbrush first to loosen crumbs. Then apply a baking soda paste to the burnt spot. Let it sit for five minutes. Wipe it off with a damp cloth. Finish with a dry wipe to clear the rest.
Is cleaning the heating element really necessary every week?
Yes, in most cases. A weekly clean keeps grease from building up. It stops smoke, smells, and uneven heat. For lighter use, you can stretch it to every two weeks—but don’t wait longer.